
Makeup Expiration Dates

Did you know that one of the most dangerous aspect of your beauty routine lies in expired makeup and unclean brushes?!
So I’ve put together a helpful guide for makeup expiration dates that show you when to throw out expired makeup and how to clean up your beauty tools and even the makeup itself!
Yes, you heard right…I bet you never knew you could sanitize your makeup!
When to Throw out Old Makeup
Just like buying a new care, as soon as you drive off the lot or in our case open up that pretty packaging, that’s IT! The clock starts ticking down!
This may sound wasteful, as you probably only used that turquoise mascara once! But trust me, expired makeup can lead to infections, rashes, or spots.
Here’s a simple guideline to follow for makeup expiration dates:
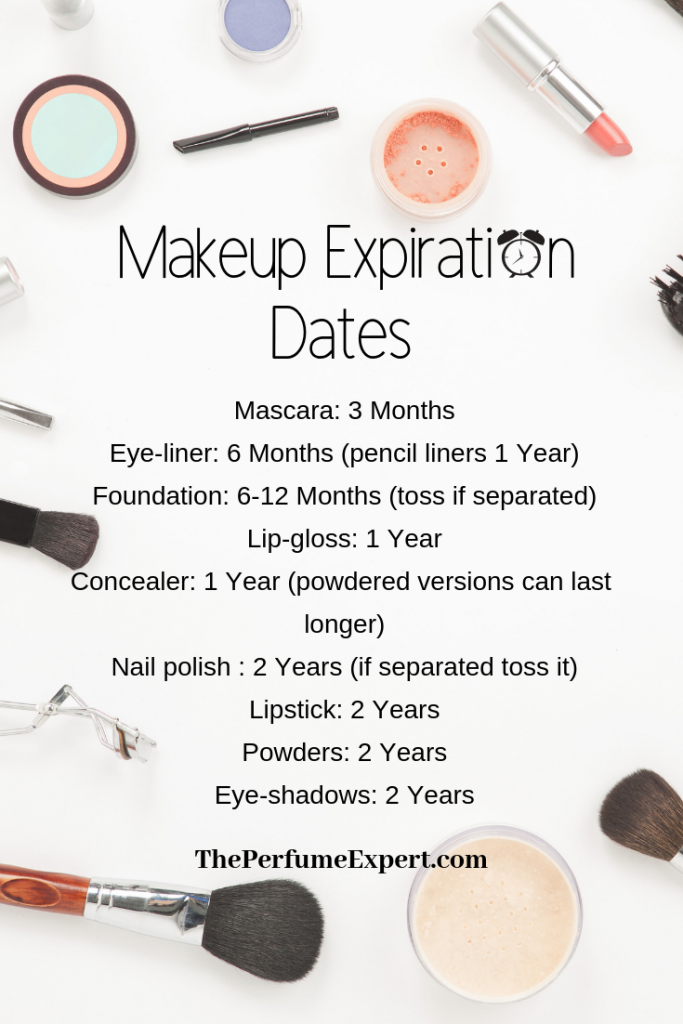
- Mascara: 3 Months (liquids are worse for being bacteria prone)
- Eye-liner: 6 Months (though pencil liners can last 1 Year)
- Foundation: 6-12 Months (toss if it starts to separate or toss sooner if you have acne-prone skin)
- Lip-gloss: 1 Year
- Concealer: 1 Year (powder concealers can last longer)
- Nail polish : 2 Years (if it starts to separate, toss it)
- Lipstick: 2 Years
- Powders: 2 Years
- Eye-shadows: 2 Years
If no symbol or date, then there’s another way to check the shelf-life. Find a code on the bottle/box, usually on the bottom. It’ll be a series of letters and numbers. Then go to this site checkcosmetics.net where you can enter the brand and code which will show you the manufacturing date. From there you can estimate when the product will expire using the guidelines below:
How to Clean Dirty Makeup Brushes
Did you know that there are harmful bacteria lurking on your makeup brushes right now?! And every day, you are literally brushing bacteria onto your skin!
Don’t feel bad, there is nothing that you can do to prevent this, bacteria is everywhere.
Makeup brushes SHOULD be washed at least every month
This timeframe is to prevent the growth and spreading of these nasty germs.
Check out these super quick and convenient solutions to keeping your makeup brushes clean.
There are some great products out there that are not only effective at eradicating the bacteria from your makeup tools, but easy and quick to use. Clean your brushes after every use with the E.L.F Studio Daily Brush Cleaner
The benefit of these products is that your brushes will dry within minutes, so if you’re mid-makeover and need to use the same brush twice you won’t have a problem.
And just so your trusty sponges aren’t left out (you’ll be shocked at how much gunk builds up in these little guys), BeautyBlender also sells the amazing Liquid BlenderCleanser.
But if you aren’t one for extra products, try this easy
DIY Brush Cleaner Recipe:
Simply apply a drop of baby shampoo to your brush, then lather and rinse!
When rinsing, try and not get water at the base of the bristles as water can loosen the glue holding the bristles/brush together over time.
Then smooth the bristles back into shape and lay flat to dry. I lay mine over the edge of the counter so that the bristles can get air on all sides. Never let brushes dry standing up as, again, water can travel down the base and loosen the glue holding the brush together.
Although cheap, the downfall of this at-home cleaner is the cleaning time (it takes a good 2-3 minutes to properly clean/rinse each brush) and drying time (brushes need overnight to dry fully). But I would recommend this as a good monthly deep clean!
How to Sanitize Your Makeup
Not only does bacteria build up on your makeup brushes, but then, every time you place that brush onto a different eye shadow, or go from your bronzer to blusher, you are spreading the bacteria from the brush to the product!
This makes your products a potential breeding ground for bacteria!
But have no fear! Because I have a trick used by some of the largest cosmetics giants in the industry!
DIY Makeup Sanitizer
This simple spray is used by beauty stores and beauty counters alike for their testers and makeovers.
All you need is Rubbing Alcohol! Create your own sanitizing spray by using at least 91% Rubbing Alcohol (has to be at least 91% otherwise it will discolor product) in a small spray bottle.
Then lightly mist (about 10-15 cm away) your shadows and powders and let air dry (takes mere seconds to dry). Or lightly mist a high-quality cotton pad and swipe the surface of your lipsticks or lip gloss wand.
This also makes for an excellent tip for professional makeup artists who are applying makeup to multiple people, or for those of us who simply can’t resist trying our sister’s/friend’s makeup from time-to-time.
Of if you’re extra lazy, try these cosmetic sanitizing wipes for the pre-done way!
About the Author
The Perfume Expert The Perfume Expert is an online Perfume Blog, Beauty Blog and Skincare Blog all rolled into one so you can stay looking good, smelling nice and feeling great all in one place! Written by an expert you can trust, I provide you with Perfume reviews, Best Perfumes, Beauty reviews and Makeup trends that are all written with passion and an eye for excellence.
Related Posts
Skincare Expiry Dates: Do Skincare Products Have a Shelf Life? →
Travel in Style with these Must Have Travel Essentials →
Spring Clean Your Beauty Routine →


 Hello fellow beauty lover!


