
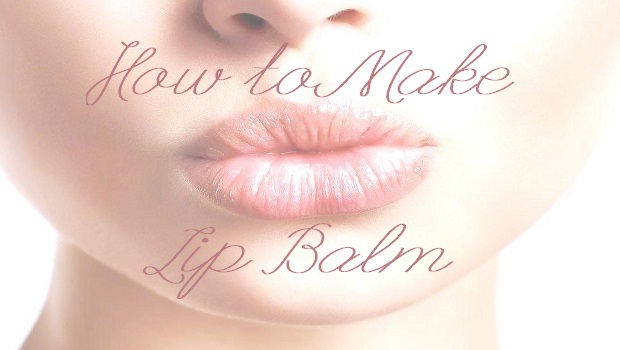
DIY Lip Balm: How to Make Lip Balm at Home

The best lip balm is the one you make yourself! You may have seen other sites teaching you how to make lip balm, but I have found the easiest lip balm recipe that is also the healthiest! (the best part about it is that it only makes what you need)
We’ve all reached for the classic chapstick or lip balm when we feel our lips getting dry or chapped but the problem is that most lip balms and lips glosses contain harsh chemicals and in some cases can make our lips even more dry!
But there’s one simple way to ensure we are using the best lip balm and that is to follow this easy DIY lip balm recipe for homemade lip balm.
This DIY lip balm uses natural skincare ingredients that not only soothe and moisturize but also protect and heal damaged skin. The key ingredients of this special recipe are Beeswax and Honey that have high anti-bacterial and healing properties; along with Coconut Oil that is not only super moisturizing but is also an antioxidant, anti-fungal, antibacterial and antimicrobial. This lip balm recipe also includes Vitamin E which is a natural antioxidant that protects skin from damaging UV rays and pollution.
You’ll be amazed at not only how easy it is to make your own lip balm or chapstick, but at the difference you’ll feel in the health and condition of your lips!
How to Make Lip Balm
Supplies:
- 1 Small deep pan or pot.
- 1 Small glass jar (use an old tomato sauce jar or something, but not something that you’ll need after as you won’t be able to get the beeswax out easily).
- 1 Medium disposable dropper (find these at your pharmacy).
- 1 Small whisk or wooden spoon (buy one from the dollar store as again, you want something that you don’t mind ruining).
- 3-5 Small tins or old/clean chapstick tubes.
- Organic Beeswax (found at your local health food or craft store in blocks or beads).
- Organic Coconut Oil (found at your local health food store).
- Raw Organic Honey (found in your grocery store or health food store).
- Vitamin E (use a gel coated Vitamin E capsule that you can prick with a pin to get the Vitamin E oil out).
- Additional additives listed below.
Ingredients:
2 tbs of Beeswax
2 1/4 tsp of Coconut Oil
3/4 tsp of Honey
4 drops of Vitamin E
Additional Additives:
For color:
Scrape off some shavings of your lipstick shade of choice.
Add a sprinkle of Koolaide powder like fruit-punch for a pink/red shade.
Add a dash of cocoa-powder for a beige/brown tone.
For added benefits and for smell:
For added health benefits add a drop of one of these essential oils; such as Lavender or Geranium for added healing, Frankincense for anti-aging, Helichrysum for repairing, Neroli for smoothing fine lines, Lemon for anti-bacterial, Melrose for fighting infection & cold sores, or Patchouli for chapped lips. I recommend Young Living Oils as they are guaranteed to be 100% pure and of the best quality. They are also safe if consumed (for those who lick their lips). You can also add a few drops of 100% pure essential oils like Lemon, Vanilla, Lavender, Rose, Ylang-Ylang, etc. for a beautiful scent.
For more information on why I recommend Young Living Oils, visit this informative page here:
For lip plumping:
Add a dash of Cinnamon. It will aggravate the delicate skin of your lips causing a natural inflammatory response plumping up your lips.
For more information on purchasing Young Living Essential Oils, visit SimplyOiled.com
Directions:
1. Fill a small deep pan with about 2 inches of water and place on medium heat.
2. When the water begins to simmer. Place the Beeswax and Coconut Oil in a small glass jar and stir constantly until melted. Be careful not to boil the mixture or over heat as this will cause the beeswax to become grainy.
3. Add the honey and Vitamin E.
4. Once all melted, take the jar out of the water, and quickly add any additional additives (listed above) like color or essential oils at the last minute and stir quickly.
6. Use a dropper to add the mixture to your containers. Do this fast as the mixture hardens quickly.
7. Leave to harden fully before applying.
About the Author
The Perfume Expert The Perfume Expert is an online Perfume Blog, Beauty Blog and Skincare Blog all rolled into one so you can stay looking good, smelling nice and feeling great all in one place! Written by an expert you can trust, I provide you with Perfume reviews, Best Perfumes, Beauty reviews and Makeup trends that are all written with passion and an eye for excellence.
Related Posts
Skincare Expiry Dates: Do Skincare Products Have a Shelf Life? →
Makeup Expiration Dates →

Bioderma Sensibio Eye Contour Gel Review →


 Hello fellow beauty lover!


